DEGAUSS SHADER MATHS & CONCEPT

I did up a degauss unity image effect for Incapacitor. During one of our meetings, we were talking about the feedback we would use for the player taking damage, as they are a robot we would not be able to use the default CoD blood screen. I have played SOMA, as you may have read about in previous posts, and *spoiler* the player is a robot. The damage feedback for the player in that is a glitchy, degauss-like visual interruption, with lots of chromatic aberration. I showed the team what the old CRT monitors looked like when they were degaussed, (example), and the team was very interested in having something much like it in our game.

I used a base Image effect shader by Steve Halliway (here) to skip the setup process, and incorporate the built in unity image effects for chromatic aberration and rendered vortex to help add to the overall look. I have changed the vortex effect so that it renders pixels from outside the source image as black, so the default one won’t look quite right.

The main thing that I did was run each of the colour channels through a sine wave, at different offsets, after offsetting the current reference pixel position by a base sine wave. This is done in the shader, and the timing for the sine is sent through the image effect script. This image effect script is used to allow easy adjustment or dynamically controlled strength of the effect itself. I split up the controls for the wobble strength and effect time, colour strength, chromatic aberration and vortex twist strength. This will be able to work for small to large damage effects.

Currently it isn’t doing a rotational wobble very well, my next goal is to add a stronger twist that over-corrects, and has a stronger twist the further from the centre of the screen it is (the unity vortex works in the opposite direction). I have also been asked to add a ‘static’ effect. I need a better description of what is required before I start designing for it, but that will also be put in.

RAYTRACER & OPTIMIZATIONS

A couple months ago, I started work on a project of optimizing a ray tracing program that was in an awful state. It started off at taking about 180,000ms to complete. It had no optimization at all, and would bounce 7 times, even if a surface was not really reflective.

I originally planned to do things like multi-threading, assumption of pixels, pixel skipping, replacing of more expensive mathematic functions with faster ones, replacing maths libraries and even using the graphics card to render.
Below are the steps that I took to reduce that render time down to ~5 seconds.

OPTIMIZATION STEPS:
step 0: added omp parallel optimization to main loop in main thread

step 1: lowered resolution, reasonable difference

step 2: changed RENDERABLES to SPHERE, to avoid using the virtual call. minimal change (113721ms)

current benchmark: (single line updates) 149097ms (cores @ 90%, no shadows, resolution 512 )) *THIS RESOLUTION WAS USED FOR ALMOST WHOLE OPTIMIZATION PROCESS)

step 3: set OMP parallelization to primary loop, instead of parralel loop. this removed ability to hit ESC though. CPU cores can finish early and are not handed out new tasks yet. (113535ms)

step 4: set primary loop to split main task into 8 (for 8 cores) and set OMP parallelization to split those 8 tasks. This should Load Balance the tasks. currently stops rendering after the first 8/16 lines though (copy paste issue)
(77971ms)
with full picture rendered: (>11000ms)
may be having issues with constantly creating and deleting new threads

This did not work properly because I am not using this correctly. Each of the threads are set to work up until a barrier (their end point in the loop) and what I want is for them to start getting work from the incomplete threads. there needs to be a task pool for them to work in.

step 5: properly set up dynamic task pool, (101518ms) & (103121ms)

step 6: set ray bounces to 1 instead of 4 (~79000ms)

step 7: project settings optimization (71766ms)

step 8: recursive limit set to 0 (36350ms)

step 9: removed ambient from final scene calc ( 36434ms)

step 10: removed reflection calculation from scene (36533ms)

step 11: set up scene octree (15991ms)

step 12: set octree to depth 5, max 10 (612ms)

step 13: shadows on, full resolution (12350ms)

step 14: max depth 10, max spheres 50 (5959ms)

step 15: set progressive to 20 (instead of 1) ( 1 is 8365ms, 20 is 6387ms)

step 16: skip every 2nd row of pixels (looks awful) (3317ms)

The final render test completed at about 5 seconds. The main optimization techniques that were useful were multi-threading, removing un-needed steps, like reflection bounces in a scene wi=thout reflective surfaces, setting up an octree and a dynamic task pool.

DED RECKONING, research and implementation

I previously spoke about ded reckoning in an earlier blog while I was working on the killbot for our tournament. Well, I won the tournament for the pathfinding section and came fourth for the target prediction section, but i would like to talk about the research and implementation of the ded reckoning system itself.


What is ded reckoning?

ded reckoning (or deduced reckoning) is used in navigation systems and is the process of calculating one’s current position by using a previously determined position, or fix, and advancing that position based upon known or estimated speeds over elapsed time and course.

Dead reckoning can give the best available information on position, but is subject to significant errors due to many factors as both speed and direction must be accurately known at all instants for position to be determined accurately.

This sort of system isnt often used for target prediction, because of the cumulative effect that errors will cause over time, however, if you only need to know where a target will be in a second or less, it can be very cost effective.

This is why it is used for dogfighting games, to display to players where they need to aim to accurately hit a target. Here is what they are displayed as in war thunder.


The reason it is needed for this situation, is the bullets have travel time, they will not immediately complete their flight path the second the trigger is pulled, so we must lead the target. However, this can be pretty hard to do, as judging distances from a screen isnt quite what our eyes are designed for. Displaying a simple, predicted flight path target for players to fire at makes the game much more accessable for every player.

What its doing, instead of using hard information to determine current position, it uses assumed information as well. It takes the current speed and direction and acceleration, the distance from the gun, and the bullet speed, and uses that info to decide, based on how long it would take a bullet to get there, how far ahead the player should lead the target to accurately hit them, and displays that position.


How did I use it for my killbot?

prediction

As we saw in the last post about my killbots targetting plans, this is what is happening behind the scenes. The killbot gets 2 scans of an enemy in the previous two turns. from this it can assume a speed and direction. (using three scans would have ensured complete accuracy though, which proved to be more useful as that is what won the tournament focussing on prediction). The simplest solution is to then determine how far the target is from my killbot, and how many turns it would take the projectile to travel that distance, and then shoot that many turns of the bots current predicted path ahead of it, however, the bullet’s travel time itself was not being taken into account for the new target. I has assumed that this would be ‘close enough’, but it was throwing my accuracy completely off. I could also not hit anyone who was always moving along a curve, but did not acocunt for this.
The problem with the bullets own travel time was that it kept adding more distance to travel for each turn it needed to travel. This looks a lot like Zeno’s paradox, Achelies and the tortoise:


So to account for this, what we need to do is, using the target prediction that we have, test to see how close the bullet will be to the enemies predicted path, for up to 60 turns, and once we find the closest that the bullet can get, use that angle. This means that the bullets travel time is now taken into acocunt. it still isnt perfect, but by including burst fire into the build, it made my bot a strong contender, coming 4th for the target prediction section.

Below is the block of code i used to converge the bullets path and target path as close as possible.

 for (int i = 1; i < 60; i++)
 {
   tempMagnitude = ((currentPos - input.position) / i) + tempVelocity;

   if (GetDistVec2(tempMagnitude, checkVelocity) < GetDistVec2(bestMagnitude, 
       checkVelocity))
   {
     bestMagnitude = currentPos + (tempMagnitude*(i - 1)*0.1); 
   } 
 }
 tempMagnitude = bestMagnitude;


never gonna be A*


A* is a computer algorithm that is widely used in pathfinding and graph traversal, the process of plotting an efficiently traversable path between multiple points, called nodes. It is noted for its high performance and accuracy.

How does it work?

This video tutorial goes through each step of setting up an A* algorithm, which will then need to be implemented into your project (for example, how do you use the list of nodes once it is returned or how do you identify impassable areas of terrain).

I am still working on implementing this pathfinding into my killbot, I have run into a lot of issues and am currently stuck on this:

The path that is returned seems to enjoy moving through walls, or the selected nodes to travel along are spaced very far apart (moving across wall sections as well).

I’m not sure this will be ready for the bot tournament, not unless I go without sleep, but I can’t afford that as I have 2 other projects due this week, and I’m leading a side project.

However, the side project is off to a great start. It is an endless runner designed to show off the capabilities of a whole bunch of animators at once. It is set up to have each team member working as much in parallel to one another as possible, and will have the capability to give credit to each artist as their work comes up, as well as allow control over things like the flow of time and camera positions. This week, I started recruiting animators, there are about 17 working on the project right now. We also chose the main themes that everyone will be working in, as shown here:


Those were chosen through voting, from a list of 20 mood boards, each submitted by a member of the animation team. Each member then got to vote for 5 different themes, meaning that everyone voted for their own board and then 4 other boards. These five were the most popular, so everyone got to have their say. Now they each get to choose one of these 5 themes to create from. The whole point of this is so that we can have background music and skyboxes that fit the models specifically (and I don’t have 20 audio guys to do 20 music tracks). I am extremely happy with the work that has been put in just to make up some nice mood boards and I am excited to see the work in its completion!

GOOD MORNING NERDS


Surprisingly enough this week, I focussed my work on the killbot, as there is a Killbot Tournament tomorrow. Over the last couple of weeks, I drank heavily while coding this thing and then stopped drinking while I untangled all of its code. I was running into constant conflicts where whatever thing I was trying to implement was being overridden by some other section of code that I had forgotten about, or was made impossible to implement as there was no safe place to push it in. I devised a new way to run the code with Adrian White, which is just three steps that the killbot moves through, with different behaviours that run based on that. This mainly makes it a lot easier to figure out what needs to happen when, and really cleans up my code, comparatively.

3 Step plan:
Killbot stepsSo as you can see in the extremely easy to follow diagram above, there are three steps to my killbots behaviour cycle.
Step 1 is a rotational scan of the battlefield, trying to spot its target. It can pick up an enemy, bullet or nothing. If it spots nothing or a bullet, it stays in this step, otherwise it moves on to
Step 2, where it scans again, except aimed at the same position where it saw the enemy last round. If doesn’t see anything, or only spots a bullet, it will move back into Step 1 again, otherwise, it will move forward into
Step 3, where it will predict the enemies movement and fire at the enemies’ estimated position.

Scanning:
The current pattern for my killbot is to rotate around by the FOV amount each turn, but flipping the angle to negative every second scan. I set this up to help avoid an enemy sitting inside its blind spot as easily (the first pattern we learn is just a clockwise rotation. it is very easy to place a bots movement pattern inside that huge blind spot based on their position and how much time has passed). The next thing my bot does is, once it fires at an enemy, it scans in the enemies last predicted position. If the enemy is not there, instead of resetting the viewing angle, it starts searching from that position. On average, this heavily reduces the time it takes to reacquire the target.

Aiming:
As previously stated, this bot uses the ‘ded reckon’ model of prediction (or something close to)prediction

The way this works is the killbot captures its targets position over 2 turns. Using this we can find the enemies’ distance traveled and movement direction per turn. by adding this to its current position, you can get a good idea of where the target will be next turn, easy! The problem lies in the time it will take our bullet to reach the target. if it will take two turns for the bullet to reach the predicted target, the we have to aim two turns ahead. Now we have even further to travel to reach the predicted target, though, and so this starts to get very messy. The best way to do this is to predict a whole bunch of angles, and the respective targets position when our bullet intersects its path until we find one where the distance between the two converges to a point (or actually collides). If the enemy continues on this path then we actually have an almost flawless accuracy.

Moving:

tumblr_lp6sv1ybni1qkrec7o1_500
Moves just like a snake…

Currently, my killbot isn’t doing very much to trick the enemies prediction, it picks a random spot on the map and snakes its way towards that spot by applying an alternating
cosine and sine offset to its movement direction. This offset was amplified by its behaviour step counter, so it turned much harder as it was firing, but in writing this I just realised that this would lower its velocity and make it, on average, much easier to hit.


Anyways, wish me luck for the tournament, if I come last I will eat a whole bag of chewable cyanide tablets.


The sun is not my friend.

This week I focussed on my killbot again.

Here’s the good stuff that happened:
Added stat tracking, now pumps out its initialized data and win state. This is the first step to setting up an AI that will set its own stats and behaviours based on the conditions it is playing in. I want to set up an AI that will find out the bot it is playing against and set itself up to best fight against that. I used this to find out what the best stats for my bot were when fighting itself.

stats1

As shown above, the best stats were a high bullet damage and medium to low health and speed. In this case, the bot had much higher bullet speed and damage. Its prediction was decent enough so that it could take out its opponent before being dealt fatal damage.

stats2

While against another bot the results for wins were similar but less pronounced.

Here’s the bad stuff that happened:
I got hit with a bad case of the heat exhaustions this week, which is a first for me. knocked me flat on my ass for a couple of days too, I couldn’t eat, stay awake and I could barely think straight, it was awful. Here’s my advice; don’t get Heat exhaustion, it really sucks.

So I began building up this thing without actually laying out a plan for it, which meant everything went right into the update. I pulled all of that out into their own functions with little issue, except that I could not find a way to get lines to draw if their code was outside of the update function. Now I could easily finish up the behaviours, and call on different functions whenever they were needed! Here is a list of what I attempted and what happened:

tried to improve upon the ded reckoning through an increase in accuracy (failed)
tried to create simple curve prediction by mirroring its path into the future (failed)
tried to incorporate bullet dodging by changing path when spotting a bullet (failed)
tried to create a function that allowed me to use debug lines anywhere (failed)
fuuuuck-mrw-i-accidentally-leave-my-phone-unlocked-next-to-my-girlfriend-and-she-check-my-messages

These were all made fairly impossible because of my ordering and spaghetti code. The prediction on the weapon is being overridden somewhere and a cannot figure out where so I cannot tell if anything I’m doing is more or less accurate.

The path mirroring into the future mirrors left to right as well as up to down, I need it to only mirror left to right. This is also only useful if the enemy is only moving in a circle that never changes in radius (or is pulling large curves very often).

Dodging is another issue where the function was being overwritten later in the code, which should be reasonably easy to fix, but this problem has only recently occurred to me and prevented my progress on the matter.

I don’t even know with the debug lines, I’m assuming I’m overwriting something somewhere, but I have no way to debug the tool I’m using to debug stuff. All I know is it works in the update function and nowhere else.

So I am pretty sure I will be able to get these issues fixed up in the next couple of days after a little more rest. I’ll clean up my code, attempt to get rid of all the parts overriding the smarter parts, and push in better prediction and bullet dodging. These should be the two behaviours required to beat the other bots.
Wish me luck!

Bezier Spline tool!

Here is where I found the tutorial to help me make this

Here is the repo link containing the Unity Package

This is what I learned while making it
First of all, I need to thank  Shaun Allen for helping me with figuring out how to export a package in unity, all you have to do is download a single file and import it in Unity, exporting has an automatic dependencies option, so you just select the main scripts and/or prefabs you want and it also selects anything else it requires to run. It’s good practice to remove anything that is not critical and include instructions on how to use the tool, especially a video tutorial. You should bury anything that isn’t used directly by the user, and ensure you set up useful folders and names. Also, comment your code! If something doesn’t work, or someone needs to change the scripts to do what they want, you can save a lot of time through commenting what everything does, what it talks to and why, and this will also help people learn how to set this sort of thing up themselves. I haven’t set up any comments in this myself, as this is the first time I have created a tool and the script itself is fairly complex, I still need to work through everything to fully understand the inner workings, so keep an eye out here for an updated version in the future.

In doing this, I learned a few things about creating tools in unity, like GUI functions and how to create an editor panel. Enabling the use of ctrl+z, and getting unity to ask if you want to save your changes when you try to close it after making changes to the spline. I even tested creating my own contextual buttons, which worked but had trouble with the script itself (I was trying to insert points to the middle of the array of points, but there are a few arrays that stopped functioning correctly, this is why I need to work through it again)
I was also made aware of other types of curves available other than bezier. The problem with a bezier curve is that to shape the curve, you need to pull its point around a lot further out than the curve sits, the problem here is that the curve never intersects a point, and is, therefore, difficult for a person to use.
The scenario would be that the curve is being used as a path for a camera, which needs to hit a very specific point or even several. On a Catmull curve, for example, the curve intersects each point which are what gets placed by the user. This is very precise, and the tool I created also does this (as this is a spline, every 4th points is intersected by the line, with the two points in between controlling the curve of the path). To control the curve, there are two ‘rotation’ handles surrounding the main handle, this is what controls the angle of the curve and speed of movement along the path.
Here is the maths behind a bezier curve. We should be using a simplified version of the cubic bezier curve.

Things I learned from playtesting the tool
The tool controls are fiddly. If you click off it, it deselects, which is some bad ‘player feedback’, and is too easy for this to happen as the handles on the tool are very small.
The handles need to have an adjustable size, this way people can decide what works best for them, as if it is too big, it will obscure too much of the scene it is in.
Its a little hard to know how to use the tool right from the get go, as it requires several scripts on separate game objects. this is mainly run through in the instructions, but thats also a wall of text, no one reads instructions anymore. A good way to fix this is to create a prefab on the top level of the hierarchy, to easily pull into the scene a working example of its functions, a demo scene of all the cool things it can do, and a tutorial video running through the correct set up of this scene.


What I want to be when I grow up

First of all, I would like to say, that there is a large difference between researching a career, and experiencing it first hand. This alone makes a question like this nearly impossible. I know what I enjoy doing, but have had a very narrow experience and find it kind of difficult even articulating what I have enjoyed most, but in short, it has been making my games look pretty. Were I to make that my career path, the closest job that encompasses that in the gaming industry is as a Tech Artist.

so what does a tech artist do?

“Technical Artists help Artists and Designers get their content into the game with the least pain possible, and help Engineers and Artists communicate fluidly.
Technical Artists must know what a healthy art pipeline “looks like” and must help make sure that content creators have the tools & support necessary to do their jobs.”  –Polycount wiki

A local Tech Artist would be Chris Webb, who is currently working as a Programmer at Defiant Development. I was reading through his twitter feed and found out about Godrays, which I thought were sun shafts because of the free unity camera effects asset package that includes them in it.

Tech Artists will normally work in a specific subset, which can vary widely through companies, the most common task being to write tools for the artists in that company.  These will usually involve Rigging, Shaders and Visual Effects.


The two that I have been interested in recently were creating my own 3D trail renderer and a shader that mixed a toon shade effect with a crosshatch effect, to override the regular shadows in Unity.

Learning how to effectively program well-optimized shaders that can make objects look amazing would be very useful, especially if I can reduce the cost of them enough to be used on mobile platforms. This means learning how to move away from bodging together code, which I am awful for and focussing on planning and documentation. I could figure out great places to start by reading through blogs of other Tech Artists and even asking them or finding out about the things that interest them.

I could instead end up working for a smaller company, where the skills that are required in me are more general, like becoming a programmer for Halfbrick or Lightmare. Halfbrick tends to work on mobile and console games and have recently been creating them using Unity as their engine, which I have a bit of experience in already. Halfbrick offers internships for programmers, offering a friendly place to start, the people who built Halfbrick also studied at SAE. Lightmare  has also been looking for interns lately, but I have heard that they can be a slightly less friendly environment.

Getting a job in a smaller studio like these would be a great place to find out what it is really like to work in the industry and help me to find my focus, which would help me decide where I would end up if I choose to work in the larger industry, or at least give me experience if I wanted to create my own studio or work in someone else’s start-up.

Without being known in the community, though, I would find it difficult to get a job in any of these places. I have recently joined a couple of meetup groups and facebook pages, specifically Game Development Brisbane and Brisbane Unity Developers. I also began following IGDA Brisbane and plan on attending these events (with my professional face on, of course) and do my best to keep active on twitter.


My work on Titan Tussle


In these last 5 weeks, I was the programmer for a group project named Titan Tussle (the project that I posted a post mortem about) where I provided about 85% of the script for. below is a link to the project repository and a list of the scripts I made, with an explanation of their function and effectiveness.

These scripts are not an example of my best work, but more an example of what I am capable of under adverse conditions with minimal time available.

1

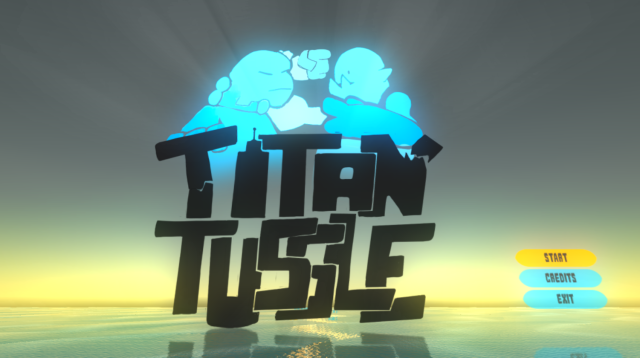
link to the titan tussle repo

AudioBehaviour

This was set up to behave as a single game object that would contain all of the audio sources in the scene. These audio sources would be kept in lists, and used pooling to avoid creating too many audio sources at once, or the need to destroy ‘one shot’ audio sources as I had in previous projects.
This script contains a public function to be called by any other script when they need an audio clip played, asking for an index range (and a bool for looping the sound, which did not end up making it in).
This function picks a random number in this range to find the index number for the desired clip, accessing the first level of a 2D list of audio sources with it. It iterates through that list, looking for the first audio source that isn’t currently playing and tells it to play. If it fails to find one in the list, it creates a new audio source component, sets its audio clip to one found in a list of audio clips using the same index, sets its volume and adds it to the 2D list, telling it to play.

This method removes some overhead with garbage collection, moves all the audio into one place, allowing easy control of each sources’ variables (like reducing the volume of each clip created in the same frame, or within a set time of the previous one, or applying a global volume level). I chose this method as I was not aware that you could play multiple clips from the same audio source component without them cutting out the currently playing clip.
It is not easy to use, however, as if you want to add a new clip into the middle of the array of clips, you move every clip after it down the list, requiring you to update every index range in every other script that calls on this, which is hard coded. This makes it difficult for use by anyone who did not make your script, or the project team whenever the audio list is updated.

The list of audio clips and the issue of adding in new clips forcing a remap of all the calls to this script could be avoided through using another 2D list, requiring only a single index number, placing the multiple possible files into these lists and the use of “unity typesafe” to automatically make available any new audio asset in script, and add them into these lists on play. Any audio dropped into an appropriate folder would then be placed into the audio clip list already in use, the random range would include it in its roll and no index numbers would need to be updated. Through use of strings as indexes, you would not even need to be aware of the correct order of the audio folders, just the name of the folder, easing use for both programmers and designers using/calling this script.

ButtonManager

This contains the behaviour of each of the title menus and the scene camera. I wanted to add something fancy to the title, so decided instead of fade in/out of canvases or scenes, or just changing the displayed text, to have canvases displayed in world space and move the camera itself to each new location. This has three states, one for each canvas, in which the controller inputs do different things. The title and credits just change the camera’s position, but the ‘pregame behaviour’ (or character select screen) is set up to help each player determine which character they are controlling, by asking each player in turn to confirm readiness. As they do, an icon of their titan (bordered by their team colour) is brought to full opacity. This did not work very well, as every player would mash their buttons at once. This could be fixed by instead allowing players to select which titan they want to play as, removing the possibility of all players just hitting the same button, and would allow players to form their own teams.

CamelBehaviour

A fairly simple script, It keeps track of player positions, finds the closest player and after a random time in a range of 1-10, adds force to itself in the opposite direction, playing an audio file when it does.

It doesn’t behave much like a camel does, as camels don’t normally launch themselves 50 meters into the air.

This should have instead used a navmesh agent or at least tried to move towards a created waypoint, and I could have asked for a walk cycle animation for the model.

2

CameraController

This carries a camera shake function, object fade and also keeps the camera focused on the center of the action.
The camera movement worked by keeping a list of the players and every frame calculating the distance between the furthest apart characters, by iterating through each character, determining its distance from each other character, adding that distance to a list and then sorting that list.
It also found an average point by adding each of the character positions together and dividing that position by the number of characters.
The average point was used as the camera’s position, and the camera was moved backwards by the max distance (clamped to a minimum and maximum) which was applied to the camera using linear interpolation.
This used to have the camera rise up with distance and rotate to look at the average position also, but created an issue where the titans looked very small and were hard to track as the camera moved further out (ending up looking down at the scene).

The object fade is a trigger for the operation in the obstacle script where a ray is drawn from the camera to each character, and if it collides with an obstacle on the way, runs its fade out function in its obstacle behaviour script.

The camera shake is run each frame if the amount of shake desired is above 0. the desired amount is reduced by Time.deltaTime every frame and is clamped to a maximum amount. The camera transform is moved by a random range of -desired amount to +desired amount, in the x and y-axis. The desired amount is added to by calling the public function ShakeCamera(desired amount). This function is simple, the desired amount is easily tweaked, it doesn’t run when it is not needed and was simple to put together and use.

In its entirety, the script is simple and effective, without being too expensive. It is using tags to find each character and stores a reference of them in its own list, but it does not search for these on start, instead requiring the game controller script to call its FindCharacters() function after it has completed Instantiating them, to avoid getting null references and allowing these characters to be removed or added into the game.

CharacterControl

This script is messy. It controls all the different actions and behaviours each player can take with each type of character (Large and Small titans). It keeps the player number info, finds and stores the correct gamepad device, Displays the character direction and attack UI element (displayed in world, not on a canvas), handles changing the character’s material colour and sets triggers in the characters animation controller.
It contains the different movement and attack behaviours for each type of titan. The large titan can only move through attacking, but can always rotate. this rotation speed increases over time while the attack button is held down. The target UI plane is turned on at the beginning of a charge and turned back off once an attack is released. The attack itself uses transform.translate to move the titan by its move speed towards the target position, which has an issue with overshooting or getting stuck, so there is a timed end to the attack, and a range within the target that will also end the attack, however, these issues still stand. The charge overshot could be fixed by just using a timeout based on how far we want to move, and getting stuck on objects could be fixed by ending a charge if our position has not changed by a certain distance since the last frame.

The small titan has the ability to move and attack. The movement went through three iterations, first strafing forwards, back, left and right with the left stick and rotating by pulling left or right on the right stick, which had the problem of being too slow and confusing. This was changed to a geometry wars style, where you still strafed with the left stick, but changed facing direction with the right stick. This was less confusing and responded much quicker, but meant that when the animations came in, you could face in the opposite direction you were facing. The controls were then changed so movement and facing direction were controlled by the left stick, so you were always moving forwards, which lined up with the animation. This allowed the use of the right thumb to attack while still being able to position the titan, also conforming to the control scheme of the large titan, easing the use of both.
The small titan attack performs an overlapSphere operation directly ahead of it, ignoring itself and calls the stun function in this script on any affected titan characters (checking for tag).
The small titan also has the ability to collect a BigShot powerup. If they have collected it, and attack, theyInstantiate a prefab projectile in front of them, and turn off the UI to display that they have the powerup.

This script also handles the collision behaviour of the titans, mainly calling the match controller script when they fall out of bounds, hitting and destroying obstacles, hitting other titans while stunned and the large titan charge attack collision behaviour (adding force to another titan in the opposite direction of the collision).

Other than the issues with the charge attack overshooting, this script also has issues with the triggers for the animations. These trigger timings cause the animations to not seem very smooth, either playing the animation too late or flicking between several at once and also have a problem of getting stuck into them. This script could have been set up as an FSM, which could have avoided a lot of the messiness of this code and made it easier to fine tune the animation transitions.

DustBehaviour

This script was set up as an alternative to a particle emitter, as I could not place a sprite animation sequence into the built in unity particle emitter system. This setup uses a rigid body component to have gravity act upon it, billboards the object, interpolates the colour to clear/black and destroys the game object after a timer hits -3. This is a very expensive way to handle this, as the obstacle Instantiates one of these every frame for ~3 seconds as it is destroyed, creating around 120 new game objects over that time, adding force in a random direction, which are then destroyed 4 seconds later, generating a fair amount of overhead through garbage collection.

This looked pretty nice with the animated particle, but they were also fairly small and hard to see the animation during gameplay.

This should have instead used the pooling method, with an effects controller to store the pool. It should also not have used a rigid body component, and instead followed a bunch of adjustable curves over its lifetime.

GameController

This script handled the spawning of the titans at the start of each match, figuring out the appropriate model and behaviour to be used for each spawned titan. After completing this, it calls the camera control script, asking it to find the titan characters to begin following them.

This function doesn’t do too much but was planned to be used to carry across information on which player chose which titan (when the plan was to have multiple available) and which map to use.

MatchController

This keeps track of team ring outs, holds the match timer and respawn timers, removes sections of terrain after enough time passes and handles the end of the match. It used to attempt to fade out a character’s material once it had hit the boundaries of the arena and ‘died’, but using the new shader system in unity 5 does not allow a solid shader to fade out to transparent. This could have just been switched from opaque to fade through code, though, this approach would also be useful for the obstacle fade behaviour.

It also changes the text in the UI, including the displayed match timer, winning and match information text and each team’s points towards winning.
This, along with most other scripts here, makes heavy use of ‘findGameObjectsWithTag’, which I have been urged not to use as it is very easy to break this functionality by changing the tags or just misspelling the tag in the script, which has no auto complete to help remove these mistakes. I have since found out that using ‘findGameObjectsOfType’ is a simple way to work around this, with the added bonus of not needing to play around in the editor to complete the connection of these scripts.

ObstacleBehaviour

This handles the obstacle’s behaviour when it is destroyed, where it slowly falls down through the ground, spawning the animated dust particles, playing sound based off if it is a building or camel and also has a fade out function, to fade the model to 10% opacity when it is obscuring the camera’s vision of a titan.

The game object is destroyed after its health is reduced to 0 (purely so the pyramid is not instantly destroyed) and a timer is reduced to 0. While the timer counts down, every frame, a dust particle is instantiated, and force is added in a random direction and strength. This is also done in fixed update. This is the messiest and least efficient way to create an already expensive game object, The least that could be done here would be to create a variable that controlled both the amount created, over a set time and to give the option of ‘bursts’ as are found in the particle emitter system.

The fade out function is not very good, every frame that it is called, it sets a bool to true, which it then checks if it is true, and if so, fades out (from its material’s current colour to clear), if not it fades back in. It then sets the bool back to false. On my laptop, this worked fine, but during playtesting it caused the buildings to flicker at a high frequency. The easiest fix would be to apply a half second timer to the bool being set back to false, but this doesn’t really remove the problem, just hides it behind a timer. A nicer solution would be to have a fade in and fade out function to be called, where if the function to fade in is not being currently called, the camera script, upon its ray cast no longer hitting this game object, would call the fadeIn function.

ProjectileBehaviour

This handles the projectile’s movement, causes camera shake, lowers the scene’s main light intensity and behaves like a large titan charge attack with increased strength. The collision behaviour was just copied from the character control script, as I knew that already worked. The movement is handled using move position to help avoid tunneling. The projectile lives for 7 seconds, lowering the light intensity for the first 2.

I have not come across any issues with this behaviour yet, but as it has such a small time to exist in the game, it is hard to test for bugs. It does cause issues with characters tunnelling through the ‘death box’ boundaries of the arena though. This could be avoided by hard-coding the boundaries.

UIContainer

This was a container created to be used in a prefab, for the MatchController to grab the appropriate UI text from.


Speed, Juice and Optimization

This week, I made a game called CLEARCUTTER

0640e66bd401445e445aac4f6c368bb1

It’s a game where you take control of two rockets simultaneously, and try to cut down as many trees as possible in 2 minutes, while not hitting them with the rockets. the closer your rockets are together the faster you accelerate, but if they touch, you explode and lose speed.

There were several tasks that I aimed to achieve for this game that I had not attempted before

  • Modifying terrain at runtime with minimal frame loss
  • Creating an endless obstacle course with a scaling challenge over time
  • Optimization of program
  • Creation of an effective high score table that persist across play sessions
  • Use of visual and aural feedback systems (like juice)
  • Creation of a ‘trail renderer’ tool, that could use shapes as its starting point
  • Use of visuals instead of text to describe mechanics to the player

I excelled in the areas of simple coding or setting up structures that I had previously set up in other projects. This sounds like it should go without saying, but there is a startling difference in the time taken between this and something new. A problem that I had was with transitioning from the planning stage to the coding stage when I had the idea, but not the knowledge of implementing it and I had to spend a lot of time researching the subject. I also had issues with clumsily bodging a solution together. This is normally good enough for simple code or a small project but becomes an issue when other structures begin to depend on it, or when refactoring the code is required. It looks like spaghetti and pressing changes to a single line can cause huge issues if you can even understand what it does. I of course also had issues with getting stuck on a problem that I did not know the solution to. It meant hours of research over things that were often simple or silly mistakes I had made earlier.

When compared to work I had experience in, there were hours of difference. This was made obvious to me when setting up the high score table. It is just three arrays of data stored into player prefs, and then set and shifted under correct circumstances. Here is an example of that code.


 void Start()
 {


 // check if this is first play
 if (PlayerPrefs.GetInt("HasScore") &amp;lt; 1)
 {
 WriteNewScores();
 }

 //clear out the restart option text until it is available
 restartText.text = " ";
 // fade in the scene from black
 GameObject.FindWithTag("ScreenFade").GetComponent&amp;lt;ScreenFade&amp;gt;().FadeIn();

 LoadScores();

 input.interactable = false;
 newHighscore.enabled = false;

 // if the gamecontroller exists, get the score and speed from it
 if (GameObject.FindGameObjectWithTag("GameController") != null)
 {
 gameController = GameObject.FindGameObjectWithTag("GameController");
 gameScore = gameController.GetComponent&amp;lt;UI&amp;gt;().GetTreeCutScore();
 topSpeed = gameController.GetComponent&amp;lt;UI&amp;gt;().topSpeed * 100;
 CheckHighScore(gameScore);
 }
 //if not, set up from title scene transition
 else
 {
 fromTitle = true;
 newHighscore.enabled = true;
 newHighscore.text = "HIGHSCORES";
 restartText.enabled = true;
 restartText.text = "Press A to return";
 }

 // now load the new scores in case of highscore and display them for the player
 LoadScores();
 DisplayScores();

 // destroy the game controller, as it is no longer needed (and to stop it from looping through the game with restart)
 Destroy(gameController);


 }

 void Update()
 {
 // if the player presses A, and is able, restart the game
 if (Input.GetButtonDown("Fire1") &amp;amp;&amp;amp; inputDone)
 {
 StartCoroutine(FadeTimer());
 GameObject.FindWithTag("ScreenFade").GetComponent&amp;lt;ScreenFade&amp;gt;().FadeOut();
 }
 }

 IEnumerator FadeTimer()
 {
 // destroy the screen fade object so it doesnt loop with restart, and load the title scene after 1 second
 yield return new WaitForSeconds(1);
 Destroy(GameObject.FindWithTag("ScreenFade"));
 Application.LoadLevel("StartScene");

 }

 void WriteNewScores()
 {
 // (for first play) set up the highscore table with 10 scores so it is not empty
 for (int index = 0; index &amp;lt;= 9; index++)
 {
 PlayerPrefs.SetInt("Score" + index.ToString(), 120 - (index * 12 + 20));
 PlayerPrefs.SetString("Name" + index.ToString(), "MAX");
 PlayerPrefs.SetString("Speed" + index.ToString(), (400 - (index * 9 + Random.Range(-200, 100))).ToString("0.00"));
 PlayerPrefs.SetInt("HasScore", 1);
 }
 }

 void DisplayScores()
 {
 // clear the score text field
 scoreText.text = "";

 // and write the scores stored in the arrays to screen
 for (int index = 0; index &amp;lt; scoreArray.Count; index++)
 {
 scoreText.text += (index + 1) + " " + nameArray[index] + " " + scoreArray[index].ToString() + " " + speedArray[index] + "GM/H" + "\n";
 }
 }

 void LoadScores()
 {
 //clear out the arrays
 scoreArray.Clear();
 nameArray.Clear();
 speedArray.Clear();

 // and add the player pref stored scores back into them
 for (int index = 0; index &amp;lt;= 9; index++)
 {
 scoreArray.Add(PlayerPrefs.GetInt("Score" + index.ToString()));
 nameArray.Add(PlayerPrefs.GetString("Name" + index.ToString()));
 speedArray.Add(PlayerPrefs.GetString("Speed" + index.ToString()));
 }
 }

 public void GetInput()
 {
 // receive the input from the input field and convert to upper case;
 nameInput = input.text.ToUpper();

 // if the input is not blank, to stop clicking auto restarting, then set the players input into the name player pref, using the stored int as the index key
 if (nameInput != "")
 {
 input.interactable = false;
 PlayerPrefs.SetString("Name" + tempInt.ToString(), nameInput);
 input.text = "";
 }

 // refresh the text display to show the new score &amp;amp; input, show restart info &amp;amp; allow restart
 LoadScores();
 DisplayScores();
 inputDone = true;
 restartText.text = "Press A to restart";
 }

 void CheckHighScore(int value)
 {
 // if we came from the title, dont do this
 if (!fromTitle)
 {
 foreach (int item in scoreArray)
 {
 // go through each score in the array, and if we have one that is higher, run update score &amp;amp; set text to reflect this to player
 if (value &amp;gt; item)
 {
 inputDone = false;
 UpdateScore(value);
 input.ActivateInputField();
 input.interactable = true;
 newHighscore.enabled = true;
 newHighscore.text = "!! NEW HIGHSCORE !!";
 break;
 }
 else
 {
 //if not, display the players score and info, and allow restart
 newHighscore.enabled = true;
 restartText.enabled = true;
 newHighscore.text = "You cut " + gameScore.ToString() + " trees, with top speed of: " + topSpeed.ToString("0.00") + "GM/H" + "\n";
 restartText.text = "Press A to restart";
 }
 }
 }
 }

 void UpdateScore(int value)
 {
 // run through array bottom to top (lowest to highest scores)
 for (int index = 9; index &amp;gt;= 0; index--)
 {
 // the first score that is higher than the players score will cause the score below it to be replaced
 if (value &amp;gt; scoreArray[index])
 {
 PlayerPrefs.SetInt("Score" + (index + 1).ToString(), PlayerPrefs.GetInt("Score" + index.ToString()));
 PlayerPrefs.SetString("Name" + (index + 1).ToString(), PlayerPrefs.GetString("Name" + index.ToString()));
 PlayerPrefs.SetString("Speed" + (index + 1).ToString(), PlayerPrefs.GetString("Speed" + index.ToString()));
 LoadScores();
 DisplayScores();
 }

 else
 {
 // if the score is lower than the players' then it will be shifted down a slot.
 PlayerPrefs.SetInt("Score" + (index + 2).ToString(), PlayerPrefs.GetInt("Score" + (index + 1).ToString()));
 PlayerPrefs.SetString("Name" + (index + 2).ToString(), PlayerPrefs.GetString("Name" + (index + 1).ToString()));
 PlayerPrefs.SetString("Speed" + (index + 2).ToString(), PlayerPrefs.GetString("Speed" + (index + 1).ToString()));
 // set the players score to the correct slot
 PlayerPrefs.SetInt("Score" + (index + 1).ToString(), gameScore);
 PlayerPrefs.SetString("Speed" + (index + 1).ToString(), topSpeed.ToString("0.00"));
 PlayerPrefs.SetString("Name" + (index + 1).ToString(), " ");
 tempInt = index + 1;
 // load and display the new score, with a gap for the players name
 LoadScores();
 DisplayScores();
 break;


 }
 if (index == 0)
 {
 // if we hit the top slot, shift it down and set the players score there
 PlayerPrefs.SetInt("Score" + (index + 1).ToString(), PlayerPrefs.GetInt("Score" + index.ToString()));
 PlayerPrefs.SetString("Name" + (index + 1).ToString(), PlayerPrefs.GetString("Name" + index.ToString()));
 PlayerPrefs.SetString("Speed" + (index + 1).ToString(), PlayerPrefs.GetString("Speed" + index.ToString()));

 PlayerPrefs.SetInt("Score" + index.ToString(), gameScore);
 PlayerPrefs.SetString("Speed" + index.ToString(), topSpeed.ToString("0.00"));
 PlayerPrefs.SetString("Name" + index.ToString(), " ");
 tempInt = index;

 LoadScores();
 DisplayScores();
 break;
 }
 }
 }

}

This is messy and not very optimal, but at under 200 lines, it should have taken an hour or so, not several.

Another issue I had was choosing a solution that I previously worked with and knew pretty well, that was not suited to the job. To check for collisions with trees, and cut them down as the player flew past them, I did a raycast check every frame from one rocket to the other. It worked fine, right up to the point where the rockets were moving. The problem was that the area of detection would eventually move so fast as to start on one side of an object you are trying to detect, and in the next frame, have moved to the other side of it, missing it completely. This issue is known as tunneling, which you get when you introduce high speeds or small objects to your game. There are several complex and elegant solutions that will avoid a tunneling issue, but what I chose to do was create a collision box whose size, rotation and position would change to reflect the amount of movement that would occur in each frame. In short, its depth was equal to the player’s speed, it was always looking at one of the rockets to keep its rotation, and its position was in between the rockets, and half their speed ahead of them.

This setup is so effective that I am confident it would detect collisions at any speed.

I tried to add feedback loops into the game, or juice and a lot of these were based on speed. To help the player feel as though they were moving fast, I made the field of view scale up to a point as they gained speed. It seems fairly subtle until you have a sudden loss in speed from collision. Once the speed reached 275, a particle emitter switched on and created shockwave like rings around the rocket. I also scaled the sizes of the rockets exhaust trail and light to reflect the acceleration from the rockets proximity to one another. In testing, this was usually noticed by the player a minute into their first run or less. This, coupled with the high score table led most players to try another run, so they could try and implement their idea of the best strategy. This best strategy was almost always the one I had wanted the player to attempt from the design stage. Along with camera effects like bloom, sun shafts, audio effects for knocking down trees and a high energy BGM, these were the positive juice items that I included.

Negative juice items were things like warning signals and explosions. The warning signals seemed reasonably effective in the early game at conveying to the player that they should not collide with trees and seemed to raise stress levels in the late game with an almost constant warning alarm going off. There was an issue with a lack of collisions at high speed, as the detection is from a single raycast forwards. I chose to leave this in, as the difficulty of reaching extreme speeds would be impossible, and would remove some of the enjoyable experience that could be had in my game. The explosions happen at the end of the run, which was received well, and also when the rockets collide with each other, which created a problem. The explosion takes up a large amount of the screen, is very bright and very loud: it is an extremely strong feedback. At the start of the game, as the rockets are constantly drawn together, they will collide. To a new player, this causes stress and the player learns that the rockets must be kept apart. Because of this, many new players held the rockets as far apart from each other for the whole run, missing the lesson of proximity = acceleration. This causes a slow and boring run, when the player realizes they were playing it wrong (from the high scores, which are now daunting multitudes greater than the players score) they will give up. This might be fixed by ramping up the strength of that attraction over the first 10 seconds, so there is no explosion at the start unless they collide the rockets themselves (but may make the controls confusing) or by better explaining this mechanic before the player is allowed to play the game (for the first run).

While creating this game, I had some serious optimization issues, which were highly problematic due to the large variation in speed, and immense top speed (~100 units/frame is the highest I have seen). The FPS would often drop below 30, when at these speeds I needed it to sit at 60. On some computers, it would even sit well above 90 for a while, which also made the game unplayable as the controls were way too touchy and the player had no time to react to anything. Moving terrains, spawning in hundreds of trees despite speed and fading out every material on a tree as you destroyed it, lots of grass and poorly optimized code were causing these issues. I received help to identify what was causing the severe loss in framerate, cleared up the code to make it as light as possible, changed the way my trees were spawned in (instead of just every half second, it also waited till the player had moved forward 5 units, so that if you were moving slowly there wasn’t a huge wall of trees spawning) and reduced the quality of the models, as since you are moving so fast, there is no time to notice model detail. Reducing the size of the terrains helped with the hang time of moving them, and once the other frame rate issues were fixed, there was plenty of time left for the operation to complete before causing a hang.

I am fairly happy with how this game turned out and if there is a good reason to keep working on it I have some plans with more things I could do to it.